====== Tutorial: Preparing a 3D Model for Theater Use ======
===== Summary =====
The purpose of this tutorial is to teach you to take a 3D asset, be it a weapon, weapon upgrade, set of gloves, or a character model from Steam Workshop, and to get it prepared for use in a custom theater.
----
===== Required/Recommended Before Starting =====
**The following are required before you can start:**
* [[software:steam|Steam]] (for sourcing 3D assets from Workshop)
* [[software:gcfscape|GCFScape]]
* [[software:vtfedit|VTFEdit]]
* [[software:xvi32|XVI32]] (or equivalent hex editor)
**The following are recommended, but only to expedite workflow:**
* [[software:advanced renamer|Advanced Renamer]] (recommended, for mass renaming of files)
----
====== Let's Get Started... ======
===== 1) Gathering Your Assets =====
==== 1a) Locating Your Workshop Files ====
You first need to gather your assets you have chosen for your item to put into your custom theater. After you have subscribed to the item on Steam Workshop (and ideally obtained permission to release the content as part of a custom theater from the original items author) you would navigate to where your Steam Workshop subscription files are stored within your local drive on your PC (the same drive as the game files themselves are.)

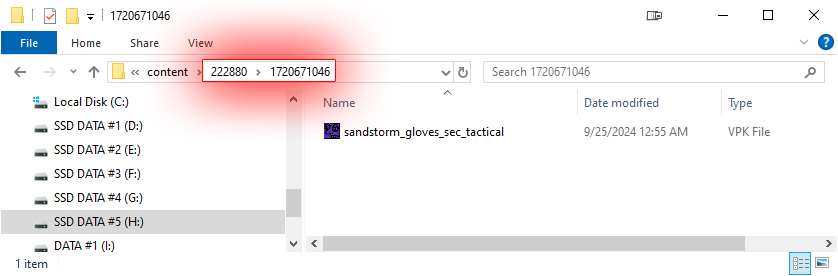
Take note in the example image above, Insurgency is located on the **H: drive** of this PC, so the Steam Workshop files for the game would also be located on this same drive. Likewise if your game is installed on a different drive (C: for example), the associated Workshop files are on that drive, in that general location: ''SteamLibrary\steamapps\workshop\content\222880''
==== 1b) Locating the Specific Subscription ====
In this tutorial I will be using a set of gloves sourced from Insurgency: Sandstorm off Steam Workshop , so if you want to follow along by using that same asset/model, subscribe to that one. It might be easier to follow this tutorial by also doing a set of gloves to follow along with the first time. The idea and methodology of converting files and such is the same, there just might possibly by more models for that specific attribute you are planning on adding though (gloves versus say a completely new weapon with many models coming together to form one, than just a pair of gloves, which is just one model.)
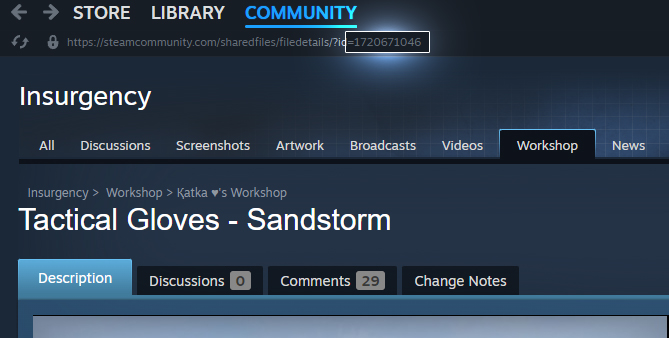
In the above image you will notice for this specific Steam Workshop modification/file, the ID is **1720671046**.
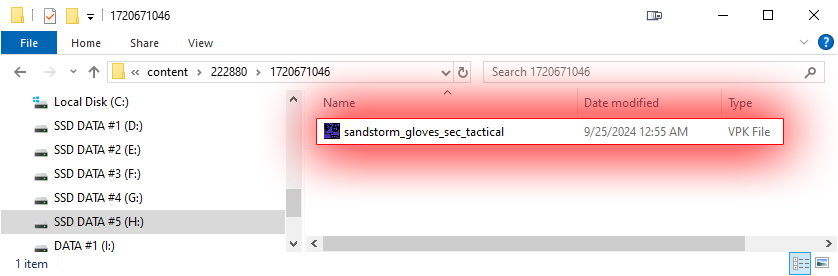
With the number in-hand **1720671046** - returning to that previously located folder/directory on your computer for your Workshop subscriptions from the previous step **SteamLibrary\steamapps\workshop\content\222880**, now locate (search for) the folder within the **222880** directory that is the same as your Steam Workshop subscription ID.
==== 1c) Opening and Extracting Contents of Workshop .vpk File ====
With the [[software:gcfscape|GCFScape software]] installed on your computer and with .vpk files already associated with and to open with GCFscape, open (or open with) the .vpk file, in this case **sandstorm_gloves_sec_tactical**.
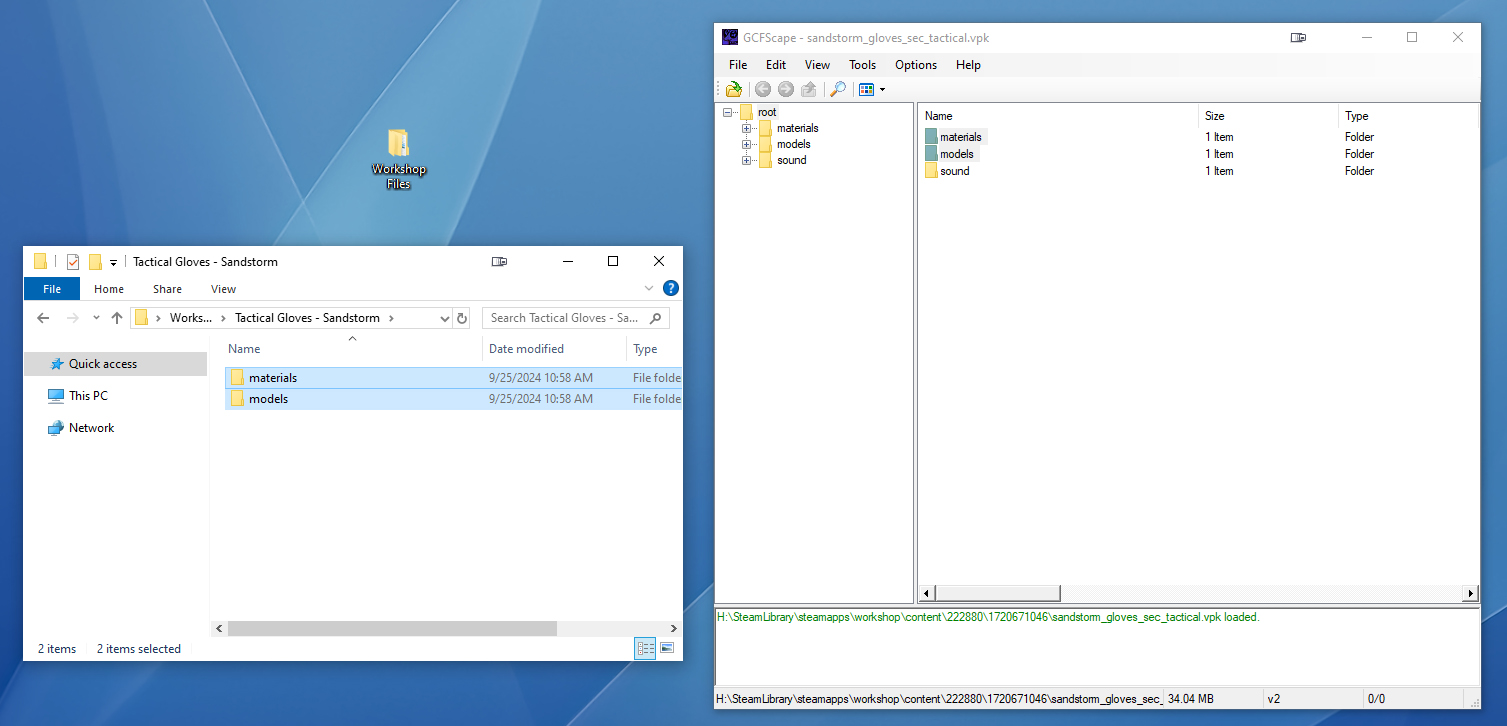
A lot of modifications that are not sound modifications or do not include sounds at all I have noticed are packaged including the sound folder. Unless you are using and sourcing files specifically that are sounds, this folder is NOT needed and can be ignored.
For most, if not all, 3D assets you prepare for a theater will have the obvious models folder and the materials folder for it's respective textures. Go ahead and drag those two folders (as pictured above, models & materials folders) to a folder on your computer.
----
Wiki Home Page